Showing posts with label spectrum noir. Show all posts

Monday, May 26, 2014

Mermaid Fun

Here is another card that I recently made.  

I was playing around with water colour paper and Tim Holtz distress inks and the turquoise background is what I ended up with.  I really love the texture that it creates on the card.  And totally reminded me of water so I pulled out one of my Kraftin Kimmie stamps.

I coloured her up with my Copics and Spectrum Noir markers and then added a super sparkly layer of Lindy's Satmp Gang Scintilating Silver! My fav!!

Here's a good look at the front and inside of the card.  Head on over to my youtube channel to see more =)


Happy Papercrafting!
Sarah

Sunday, December 16, 2012

Christmas Card Catch Up

I want to start off right away and apologize for not posting sooner, this month has been absolutely crazy.  I feel like there has been no time for anything, between work and everyone in the family being sick with the flu.  It has not been fun.

Well I thought to make up for it I would show you some of the cards I have been working on.  The first one is this super cute Penny Black stamp that I got last year.  I coloured her up with my spectrum noir markers and added some white flocking and green chunky glitter.  One of my favorite cards this year!


The next one is just a basic 5.5 x 5.5 card with a Greeting Farm image that I've had for a while.  Coloured up with my spectrum noir markers and layered with some patterned papers and spellbinders.


 The next one is a super cute house mouse stamp that has been in my stash for ages.  I did up a card base and put it through the cuttlebug for the tree embossing. The image itself was embossed with a handcut circle to get the embossing only in a circle around the image. 

 And this one is using a spellbinders for a cook-coo clock.  Really love how this one worked out.  I used glitter paper for the fringe and added some ink for distressing. 


 Lastly I have Santa and Frosty which were coloured with my spectrum noir markers and layered with patterned paper and spellbinders.
Hoping that everyone has a wonderful christmas as I probably will not be posting again before then. 


Happy Paper Crafting!
Sarah

Sunday, December 2, 2012

Another Christmas Card - Snowman

This Saturday was Scrappin Great Deals 4th Anniversary for being in their new store.  I remember my mom calling Sheila up on the phone and asking if we could pop by her house to go shopping in her basement.  It was so much fun to look around at all the stuff that she had.  I always wanted to have a basement like Sheila's full of scrapbooking and stamping supplies - lol.

So of course I had to go to their Anniversary celebration.  I was not lucky enough to get their early for the make and take package but I was able to sit down with Judy and make her gorgeous cover page!! 

And I had to buy the stamp set!!

Here is the amazing cover to a little booklet that Judy designed - I told you she was amazing.  Mine of course is nothing like hers, she does such a great job.  And the detail of covering everything with flowersoft snow when you're done is so great. 

I wanted my card to be all layered and amazing just like Judy's but it turned out a little different.  I have a really hard time getting away from clean and simple when it comes to card making - must be my years of being a Stampin' Up demonstrator - hehehe.

Well I love how he turned out anyways and I used some tricks and tips that Judy taught me.  The snowman was stamped on confetti white cardstock and his little nose and buttons coloured in with my Spectrum Noir markers and finished off with some glossy accents.  The hat and scarf were stamped on pattered paper and then I added some shading with my markers - of course I had to stamp the hat a couple of times to get the base, the band and then the holly which was coloured and glossy accent added.  Lastly the arms and the sign were stamped on kraft cardstock and shaded with my markers - two layers were done for the sign.  The "Merry" is from my new favourite Paper Smooches Christmas sayings stamp set.  

After everything was stamped and coloured I layered all the pieces with silicone - one the best things Judy ever taught me.  Then he was added to a layered card base.  The snow is actual glitter snow brushed onto the card and then added another layer that I cut out of cardstock first.  Below is a picture from the top so you can see all the dimension that I added to the card.  I did quite a few of these guys so I have seven more with different coloured scarves just waiting to be added to cards.

 Hope you enjoyed and can find some inspiration for your Christmas cards!
 
Happy Paper Crafting!
Sarah

Wednesday, November 14, 2012

First of the Christmas Cards

I finally finished a couple of Christmas cards that I've been working on for a little bit.  The images are from Pink Gem Studios - they were some that my mom had stamped and given to me last year so they've been hanging around a bit :-)

I finally pulled out my Spectrum Noir Markers and started to colour.  I chose my colours by picking the paper first, which was a little 6x6 pad of Snow Day by Crate Paper - they happened to get some in at Home Sense (so I bought two).

Here is the inside of the first card.  I used my new Spellbinders die from page maps - Jar Labels (also purchased at Home Sense).  I added a little bit of lace trim from Hobby Lobby and a beautiful white glittered poinsettia from Michaels $1.50 bin.  Oh and the sentiment is from Paper Smooches.
And here is the second one - also from Pink Gem Studios - I really love how their hair turned out, love love love my Spectrum Noir Markers.  This one I added in some of my new trim from Mary Maxim and a little bit of rose trim from Crafts 2000.  The dies in this one were from the same Spellbinders set - Jar Labels.

I did add some mulberry paper in the background that had silver embossed dots on it, for something a little different and sparkly.
Well hope you enjoy.  I have a couple other ones that I'm working on with some different images and traditional reds and greens.  So many ideas but so little time!

Happy Paper Crafting!
Sarah

Sunday, May 27, 2012

Rainy Day

Well it's a bit of a rainy day here today so what better to do than to color.  With my new favorite markers.  All right, all right, I'll stop now.

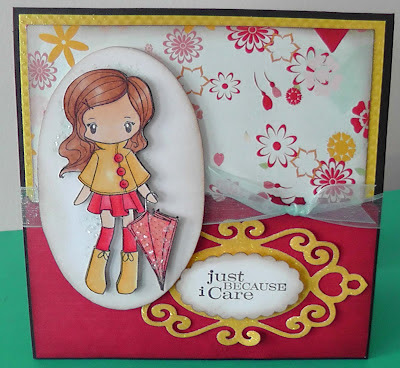
Here's a Greeting Farm image that has been in my pre-stamped stash for a while.  I colored her up and decorated the card with some of my scraps.  Just had to share to try and add some sun shine to our rainy day.


I have to point out some things that I did and where the inspiration came from.

Well first off I love to color but sometimes I don't always stay in the lines, especially when blending the markers sometimes bleed outside of the lines.  So to take care of that I usually end up cutting the image out instead of leaving it on the paper it is stamped on.  Well I really like how Mariska over at Sending you a little smile:) layers her images but I definitely do not have the patience to color and cut all those layers so I decided what if I pop up my image and put it on time of a blacked out image.  Well voila - I love it!

Secondly, I really love how Linda Heavens glitters up everything!!  So I had to try that out too.

Well I really love how it worked out.  And will definitely be doing more.

Happy Papercrafting!
Sarah

Spectrum Marker Storage

Good morning!  I'm working on some DT layouts this weekend but I wanted to share my home made Marker Storage.  Of course since I bought my new markers and they came in different packaging I had to find a spot that I could store all 168 markers so that I could see them.  While I was wondering around Walmart supposedly getting groceries - I was in the craft isle - I saw a set of three baskets which you couldn't really tell were baskets because they were flat and you had to put them together yourself.  Well what peaked my interest was that they were marked down to $5 - yes $5 for three baskets!!

So I said, sure lets try it out - if anything I have three more baskets for storage in my scrap room.

I have to say that putting the baskets together was frustrating!! but I do love the outcome.  I used the medium sized basket and some foam board that I had lying around.  I measured out the foam board and made a grid to insert into the basket.  Pretty cool huh?!

I ended up organizing them by color which makes it easier when I'm looking for something.  I'm really loving my new markers!

Happy Papercrafting!
Sarah

Monday, May 21, 2012

Back to Colouring


Okay so I haven't been doing too many cards lately and especially with coloured images.  But I got some new toys on the weekend and couldn't wait to break them in.  I used to colour with Prismacolor art markers and have been checking out all the stuff on the internet about the new Spectrum Noir markers.  
So guess what I found and got a really great deal on!  Yip, yippee!  I got the all four sets of 24 (Pastels, Lights, Darks and Brights) and then all twelve sets of 6 - yes you got it - all 168 colours are mine!  All are double ended alcohol ink markers that are great for colouring and shading and get this...way cheaper than Copics.  

Now you must be thinking - if I got all brand new markers than what is going to happen with all my prismacolor markers??  Well you know who has been chomping at the bit and finally got her little hands on them.  We did go through and weed out alot of colours that she didn't think she would use and ended up with a couple less than 60.  What 10 year old do you know has 60 art markers for scrapbooking!!
 
Here's a close up of my first attempt with my new markers.  I was a little overwhelmed with all the colours so please don't laugh at my choices.  I have since printed off the colour chart from online and filled it all in so I can see everything I have - still overwhelming!


I really love the way that it turned out though.  I used my new doily border punch and some of my rhinestones that I got (huge bucket of rhinestones).  I also added a crochet flower that I made myself and stained with distress ink.  Stay tuned for more!!


Happy Papercrafting!
Sarah